Posts Tagged ‘Low Poly’
Game – Stop Sign
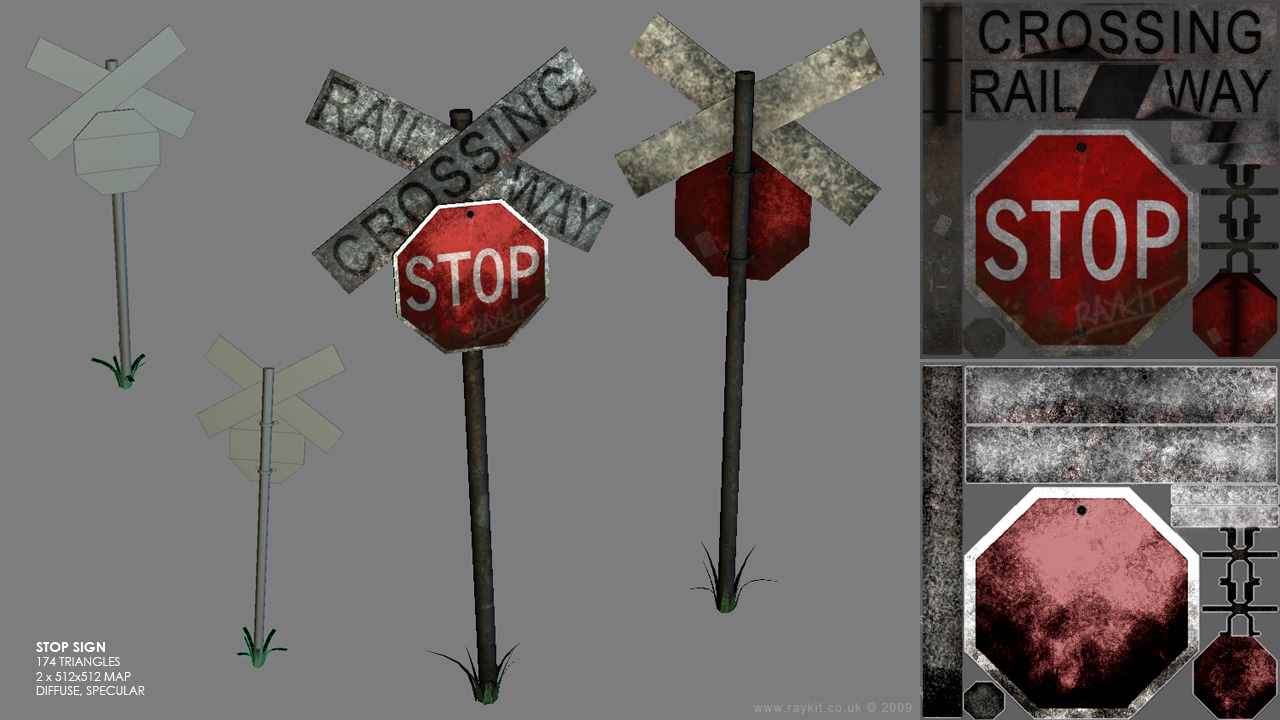
Here’s a quick low poly model of a railway stop sign done as an exercise, all the textures were made from scratch.
Game – Dart Board

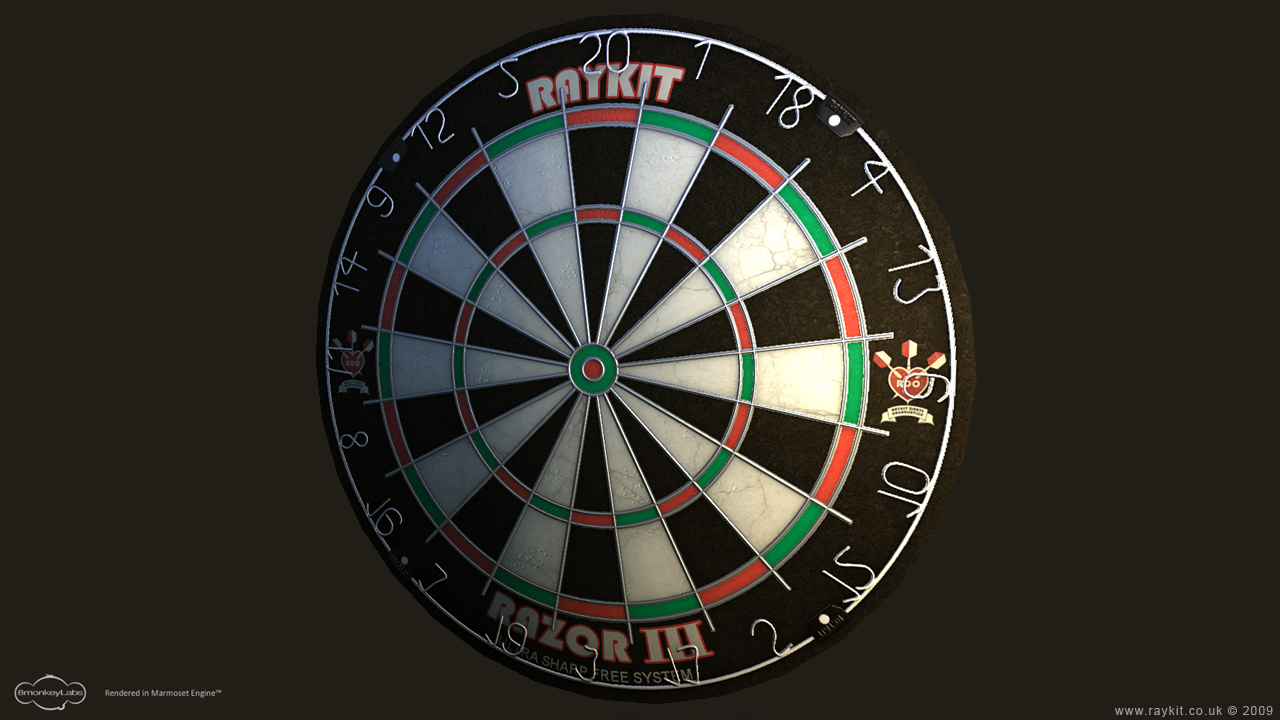

It’s been awhile since I last posted, I’ve been trying to get my head round the high and low poly baking process and tackling the smoothing issue.
Here is a dart board done mainly as an exercise. I’d first created a high poly version of the object and then projected it with the low poly. I’d initially baked the Normal map in 3Ds Max but then used xNormal application as it produced better result and also quicker to generated the Ambient Occlusion map.
Before texturing I baked a Diffuse map with the high poly in seperate coloured elements using sub/object material, this made selecting the wire part alot easier in Photoshop.
I’ve added extra detail on the Normal map at a later stage using the Normal filter in Photoshop and did the logo using Illustrator.
I’ve used doylle viewport shader to display my dart board as it produced nicer result than the standard shader. I’ve also imported it into the Marmoset Engine which makes anything look great!
Game – Skip
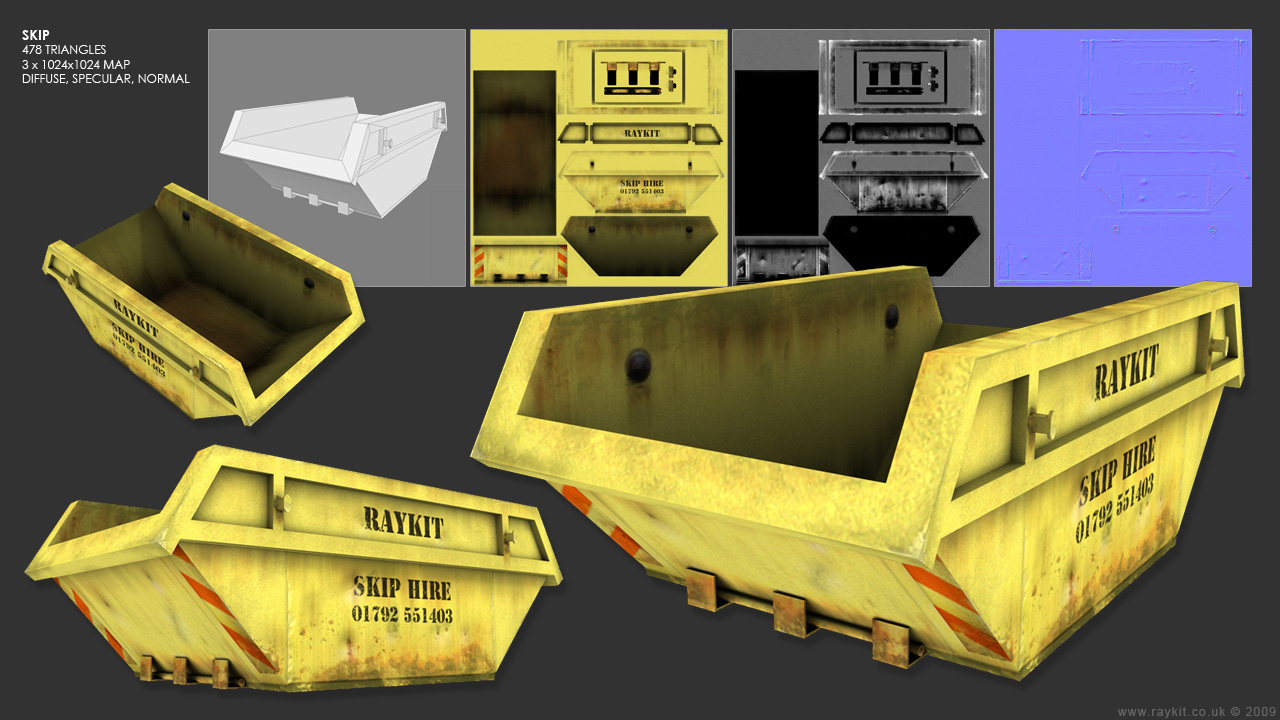
Here’s my first attempt at low poly modeling and texturing. I’ve chosen an object that had fairly simple geometry, so I decided to model a rubbish skip as it’s very box-like in shape and had some interesting texture on it.
In the modeling stage, I’ve tried to keep the poly count as low as possible but still retaining the basic shape. I’ve applied the unwrap UVW modifier to the object which took awhile to do and then exported the UVW template to photoshop ready to be textured.
Beforing texturing, I’ve rendered an Ambient Occlusion map using Mental Ray renderer which helps bring out the shadows and gives depth to the map. This was applied as a layer in Photoshop which made it easier to texture as I could identify which area where sticking out and which were hidden in.
All of the texture where done from scratch apart from the rust which was taken from a stock photo. I’ve emphasised the rust by duplicating the layer and added a motion blur underneath to give that drippy effect. I’ve greyscaled the diffuse map to create the specular map and altered the levels. The normal map was done using the Photoshop plug-in to add the bump effect.
A few areas that I could improve on are the edges on the skip which could of been chamfered to give it a smoother finish, but as this was also my first time at unwrapping UVW I didn’t want to complicate things. Another area would be to add the extra poly to the inside bolts to make it stick out abit more.
Overall I’m pleased with the result and I’ve learnt quite a few new techniques along the way.