Posts Tagged ‘V-Ray’
3D – Retro Microphone

This is a render of a retro microphone with the use of HDRI of an attic room to light the scene and also act as the background image. The rendering time was about 40 minutes and then the post production work was done in Photoshop afterward.
Click here to see the WIP images of the microphone model.
3D – Perfume Bottles
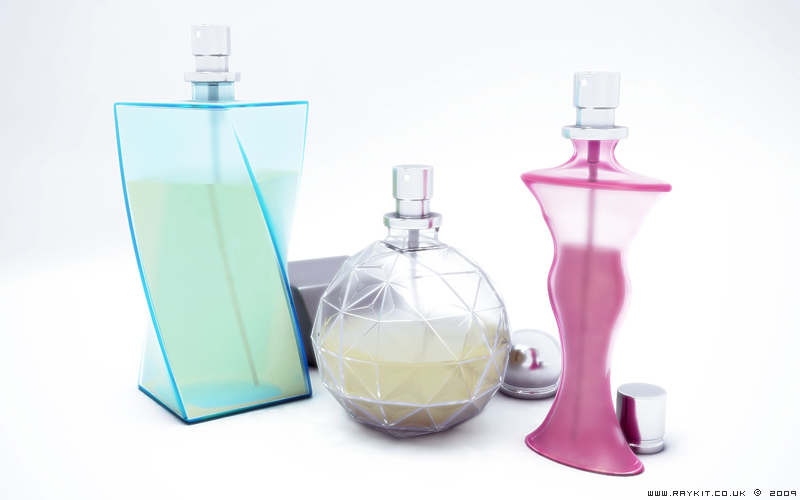
This is a scene of some perfume bottles shot in a studio surrounding. Initially I used Mental Ray to render the scene but I wasn’t satisfied with the result, so I chose V-Ray once again. The final render took roughly 2 hours and 40 minutes, the longer rendering time was due to the vast amount of reflection and refraction used in the scene.
The scene was lit using a V-Ray light and a direct light to bring the highlights in the chrome and the caustics in the glass.To achieve the realistic looking glass and liquid materials, alterations were done to the Fresnal reflection and the IOR (Index of Refraction) settings to create the bending of light.
For improvements, I would maybe have a bit more caustics to the surface, add some sort of brand identity and also make the liquid slightly more transparent but overall, I’m pleased with the outcome.
Click here to view the 3D Studio Max viewport of the scene.
Click here to see the WIP image of this scene.
3D – Earphones

[Model: Apple iPod Earphones]
Here is a finished scene of an iPod earphones lying on a desk, rendered in V-Ray. The scene was lit using a single V-Ray light and a skylight, this took about 14 minutes to render.
The ambient occlusion pass was rendered using V-Ray instead of my normal method of using Mental Ray due to the V-Ray light being used. This pass was done using a VrayLight Material with a VrayDirt assigned.
Photoshop was used afterwards for post production to complete the final image.
Click here to see the WIP images of the model.
3D – Guitar Capo

[Model: Dunlop Trigger Guitar Capo]
Here is a completed scene of the guitar capo done using V-Ray renderer. The setup to this was a single target spotlight, standard V-Ray materials with a speckle on the gold metal and a wood surface texture taken from cgtextures. It took around 40 minutes to render the final image on a slightly higher resolution.
For the post-production stage, I have also rendered an ambient occlusion pass using Mental Ray renderer to futher enhance the shadows and a depth of field pass to create a realistic lens blur. These were later incoporated using Photoshop.
The image was sharpen up using the unsharped mask filter and altered the contrasts using the levels and saturation. To finish off, i’ve added a vignette filter to darken the surrounding corners, which helps focus the eye to the subject.
Click here to see the extra render passes.
Click here to see the WIP images of the capo model.