Archive for the ‘3D’ Category
3D – Bathroom Scene [WiP]
![3D Bathroom Scene [WiP]](http://raykit.co.uk/blog/images/raykitshum_3d_scene_bathroom_1.jpg)
Here’s a working scene of a simple modern bathroom using some design ideas from a few furniture catalogues.
3D – Electric Guitar

[Model: Fender Contemporary Stratocaster]
Here are the completed renders of the Fender Stratocaster guitar. You can view the WIP images by clicking here.
Since the body of the guitar had a glossy black finish, I didn’t need to unwrap the UVW, I did however needed to unwrap the fretboard and guitar neck to texture the wood and the skunk stripe inlay at the back.
I’d experimented with various scenes and test rendered different HDRI maps as I went along. Initially, I was going to have the guitar resting on a carpet floor but was not satisfied with the result. I wanted to add more interest to the composition and decided to have the guitar resting on a soft bed-like surface instead.
My approach in creating the surface was to start with a plane geometry that had additional segments. I’d then applied a cloth modifier and have it collide with the guitar neck and body polygon, this created a basic shape that could be worked on.

To created the creases on the surface, I had to first convert it into editable poly and then use the paint deformation to “paint” the creases in. To help me with this, I’ve put my real guitar on my bed as a reference guide to see where the creases would mainly be. I’ve added a relax modifier afterwards to soften some of the edges on the surface.
For the 2nd render showing the back of the guitar, I had to mirror the surface and re-adjust some of the creases to fit with the new shape. You can view the wireframe of the cloth geometry by clicking here.
The scene contains 6 lights in total, 1 vray dome light with HDRI and a omni light. The HDRI is a panoramic image of a bedroom that contain 2 windows and I’ve placed a vraylight and spotlight on each side.
Overall, I’m pleased with the outcome of the final images. It took around 3 hours to render each one. The long rendering time was due to the vast amount of polygons used.
I really like how the cloth has turned out in the end and the soft shadows that it produces. There is a nice contrast between the dark glossy finish of the guitar and the bright colourful background.
3D – Bass Guitar – Used Version

This is a beat-up version of the Rickenbacker bass guitar. I wanted to try and recreate the look of a used guitar with scratch marks and paint chips around the body. I thought this would make an interesting render and something different to the normal ‘clean’ renders.
The changes made to the original renders are the HDRI and texture maps. I wanted to give the scene an outdoor look so I changed the wood texture on the floor into more patio-like appearance.
To created the paint chips on the body of the guitar, I’ve added a layer mask on the blue fill layer to reveal the wood grain without the fill covering it. I’ve also incorporated an inner glow and stroke surrounding the chip to highlight the edge of the paint.
The bump map was created from the texture map with the scratches and dents filled in black on a grey background. The rendering time for this scene was just under 40 minutes.
Overall, I’m pleased with the final image. I like the contrast of the blue tone on the guitar with the reflection of the sunlight beaming down on it. Click here to view some of the maps used for this scene.
3D – Bass Guitar

[Model: Rickenbacker 4003]
Here are the finished rendered images of the bass guitar. You can view the WIP images of this model by clicking here.
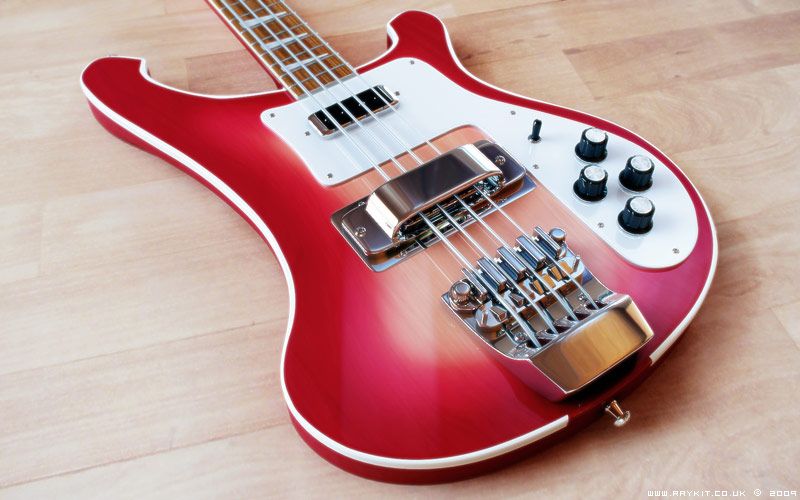
There are a range of colours available for the Rickenbacker guitars which I could base my model on. I decided to go for the most popular range and also the most interesting to texture; the fireglow paint job, which is a burst of 2 tones of red with wood grains showing underneath.
It was fairly simple to achieive the fireglow look in Photoshop using the various blending modes and gently paint brushing the surrounding edges with masking on the outside.

The pearl texture on the fret markers was done from scratch using several tools such as cloud and sponge filters.
A gradient texture was used on the bump map of the strings to achieve the right look and a radial bump map was used to create the anisotropic effect of the metal on the control dials.

The lightings used in the scene were 1 vray dome light with HDRI, 2 spotlights and a omni light. The spotlights were positioned according to where the lights were in the HDRI.

The images were rendered in V-Ray with Adaptive subdivision and took just under an hour each to render, then put into Photoshop for some final touches. Overall, I’m pleased with how well the finished renders turned out in the end.
3D – Acoustic Guitar
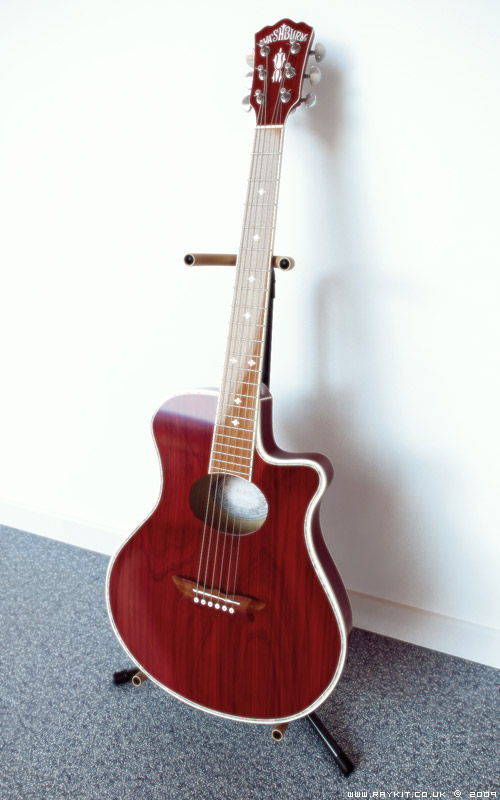
[Model: Washburn EA-18 Acoustic Guitar]
Here are the completed renders of my 3D acoustic guitar model. After modeling the guitar which you can view the WIP images here, I begun applying individual material to each part of the guitar and for most parts it only needed diffuse colour and reflection setting changing.
For the main parts of the guitar such as the neck and body, it needed UVW unwrapping in order to apply the wood texture and the edge binding correctly. The process for this part was removing the meshsmooth modifier first and unwrapping the model at its lower poly stage, then adding the meshsmooth back afterwards and rendering the UVW template.
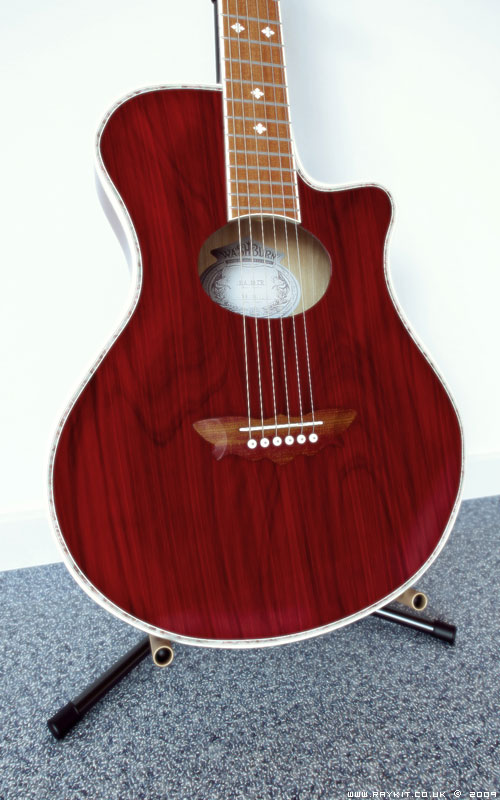
For the texturing, I used photoshop with stock images from cgtextures.com. The wood texture of the guitar were a combination of two layer of wood images that had different grains and combined together using the blending mode.
The logo detail and the branding sticker were photos I’ve took of my guitar and then incorporated into the texture.

The lights that were used in the scene were 1 vray dome light with HDRI, 1 vraylight, 1 spotlight and 1 omni light. The omni light helped bounce the light inside the hole of the guitar body and made the texture detail more visible.
A lot of time were spent experimenting with different HDRI to create the right look for the scene. As there was already a lot of wood texture on the guitar, I didn’t want to have wood texture on the floor as well, so I’d decided to go with blue carpet with a displacement map added to raise the fabric up alittle.

Certain areas of the scene were too bright and had washed away some of the details, so in the V-Ray setting, I’ve altered the colour mapping from Linear multiply to Reinhard which toned the brightness down and brought back the details in. This had also helped decreased the rendering time a fair bit.
Each rendered image took just over an hour to render at a much larger resolution. An ambient occlusion and depth of field map were also rendered for each image and incorporated in the post-production stage using Photoshop.

Overall, I’m pleased with the outcome of the renders. It was fun incorporating all the different materials in and seeing it react with the HDRI environment.